
使用backward_ros功能包实现GDB调试ROS2程序,使用sudo apt-get install -y ros-jazzy-backward-ros。只需下面三个步骤:
添加backward_ros到package.xml文件:<depend>backward_ros</depend>
添加到CMakeLists.txt文件: find_package(backward_ros REQUIRED)
使用Debug 或者 RelWithDebInfo选项编译程序:colcon build --cmake-args '-DCMAKE_BUILD_TYPE=RelWithDebInfo'
正常运行后就可以看到出错时的堆栈信息。
Benchmark是Goole的一个开源基准测试框架,主要用于比较不同代码实现的性能和效率。Benchmak提供了丰富的测试功能,包括时、统计和分析等,可以帮助开发人员优化程序的性能和效率。
可以使用包管理器或者源代码安装Benchmark。安装sudo apt-get install libbenchmark-dev1
首先,我们需要编写一个简单的测试函数,用于对比不同实现的性能。以计算数组元素之和为例,我们可以编写以下函数.1
2
3
4
5
6
7
8
9
10
11
12
13
14
15
16
static void BM_accumulate(benchmark::State& state)
{
std::vector<int> vec(state.range(0));
std::iota(vec.begin(), vec.end(), 0);
for (auto _ : state) {
int sum = std::accumulate(vec.begin(), vec.end(), 0);
benchmark::DoNotOptimize(sum);
}
}
BENCHMARK(BM_accumulate)->Arg(100)->Arg(1000)->Arg(10000);
这个函数使用了Benchmark提供的 tate 对象,该对象可以帮助我们迭代多次测试,并记录每次测试的结果。在函数中,我们先使用std::vector 生成一个指定大小的数组,并用 std::iota 填数组元素。然后,我们使用 std::accumulate 计算数组元素之和,并调用benchmark::DoNotoptimize 来确保这个计算不会被优化掉,最后,我们使用 BENCHMARK 宏将这个函数注册为基准测试用例,并使用Arg 方法指定测试用例的参数。
编写测试用例后,我们可以使用 benchmark::RunSpecifiedBenchmarks 函数来运行所有注册的基准测试用例,并生成测试报告。代码如下:1
2
3
4
5int main(int argc, char** argv)
{
::benchmark::Initialize(&argc, argv);
::benchmark::RunSpecifiedBenchmarks();
}
运行后1
2
3
4
5
6
7
8
9
10
11
12
13Run on (8 X 2200 MHz CPU s)
CPU Caches:
L1 Data 32 KiB (x8)
L1 Instruction 32 KiB (x8)
L2 Unified 256 KiB (x8)
L3 Unified 8192 KiB (x1)
Load Average: 1.20, 1.33, 1.18
-------------------------------------------------------------------------
Benchmark Time CPU Iterations
-------------------------------------------------------------------------
BM_accumulate/100 208 ns 208 ns 3251616
BM_accumulate/1000 2236 ns 2236 ns 313125
BM_accumulate/10000 22563 ns 22561 ns 31189
这个报告显示了每个测试用例的执行时间、吞吐量和标准差,以及与其他测试的比较。同时,也会显示出每个测试函数的代码行数和CPU 循环数等重详细的信息。除了默认的报告格式外,Goodle Benchmak 还提供了其他输出格式,例如 JSON、CSV 和 console等可以使用相应的命令行选项进行设置。
Goocle Benchmak 是一个基于 C++ 的高性能基准测试库,可以对代码的运行时间、内存使用和 CPU 循环等方面进行准确的测量和分析,帮助开发者优化代码性能。使用 Google Benchmark,可以轻松编写测试用例,自定义测试参数和运行选项,并生成详细的测试报告,方便分析和比较测试结果。
在Nano上安装perf,参考这里,我下载的页面是
先用ps aux找到进程的PID,再观察进程内各个函数的CPU使用情况:sudo perf top -p <pid>
记录采样结果,以供后续分析,加上-g会记录调用链:sudo perf record -g -p <pid>
在当前终端读取采样结果:sudo perf report,会自动读取perf.data
如果进程在运行期间发生奔溃,操作系统会为进程生成一个快照文件,这个文件就叫做 core dump。之后我们可以对 core dump 文件进行分析,弄清楚进程为什么会奔溃。默认情况下,Linux 不允许生成 core dump 文件。
ulimit -c的结果是0,说明还未开启。命令ulimit -c unlimited只能在当前终端生效,所以加入~/.bashrc。指定core dump文件的路径: 修改/etc/sysctl.conf,在最后添加 kernel.core_pattern=/home/user/coredump_%e_%p_%s_%t,命名格式为 命令名_PID_导致core的信号_UNIX时间。 cat /proc/sys/kernel/core_pattern可以查看设置的格式。
执行sysctl -p
遇到程序非正常阻塞不运行时,在另一个终端查看其PID,然后使用 kill -s SIGSEGV <pid>产生 core dump 文件,这样就可以快速重启程序,然后慢慢分析 core dump 文件。
gdb ./exec /path/coredump_file,就可以回放core dump编译之后,运行时出现这样的结果
重新编译后依然如此,只好删掉build文件夹里对应的文件,再编译后就没问题了
workspace/src下有多个package包,有时候只想不编译某个package。可以在不想被编译的package目录下新建了CATKIN_IGNORE 文件,不用写任何东东。返回到workspace目录下后执行catkin_make就不会编译带有CATKIN_IGNORE的package。
如果当src中有一个package中已经有这样的文件(命名为CATKIN_IGNORE的空文件)时,当你指定要编译这个package时: catkin_make --pkg your-pkg-name会报错:1
Packages "your-pkg-name" not found in the workspace
catkin_make之所以有时报错内存不足,有时正常,是因为编译是按拓扑顺序,可能同时编译了move_base和teb_local_planner这两个耗内存大的包,导致报错
catkin_make中途 ctrl+C 造成一个新的package放入工作空间后,是不能直接识别的,无论source setup.bash还是catkin_make --pkg都不行,必须先对整个工作空间catkin_make,此时才会识别它
要尽量避免这种情况,否则会混乱。此时如果有问题,用echo $ROS_PACKAGE_PATH查看环境变量包含的ROS工作空间

执行catkin_make时,有时会报错Could not find GTest,这是由于缺少测试模块,加-DBUILD_TESTING=OFF可以避免测试。
把ROS的工作空间转移到另一台电脑上会编译失败,build和devel里有很多文件会构成影响,即使二者的用户名一样也不行。所以每次只能复制src文件夹,放到另一台电脑的工作空间里。
我的一个自定义msg,将整个工作空间移植到另一台电脑,编译没出错,但是echo出错,好像rostopic不被识别一样:
使用qt-ros-plugin,不知怎么操作,导致find_package(catkin)无法识别catkin,不能在任何工作空间编译,其他命令都正常。利用whereis catkin找到路径,删除相应文件,然后重装ROS
命令catkin_init_workspace:Initializes a catkin workspace by creating a top-level CMakeLists.txt.
这个命令最好不要用,创建工作空间还是新建文件夹,然后进入执行catkin_make
执行catkin_make时,报错:,执行roscd等命令也提示没有安装,感觉就像是没有装ros一样。解决方法: source /opt/ros/kinetic/setup.bash
编译禾赛雷达的驱动HesaiLidar_General_ROS,结果报错PandarScan.h: No such file or directory. 然后又catkin_make一次,竟然成功了。这时去devel/include里可以看到缺少的头文件了。 应当是第一次编译时确实缺少,然后接着编译剩下部分,此时就生成头文件了。 再编译第二次,原来需要头文件的地方就编译成功了。
参考: HesaiLidar_General_ROS/issues/24

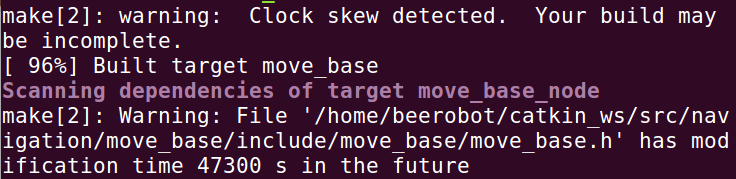
出现这个警告是由于时钟不同步导致的,即系统时间比文件修改时间早,换到另一个Linux系统切换可能会出现这个问题。
如果在不同计算机之间传输文件,可能出现这种报警,是由于二者的UTC对时不同。现象是文件的修改时间比当前的系统时间还要晚。可能会导致某些不该编译的文件编译,或者该编译的没有编译。
在受影响的文件夹内执行一次 touch *即可永久修正这一问题。
依次执行下列指令即可1
2
3find . -type f | xargs -n 5 touch
catkin_make clean
catkin_make
将所有文件都重新touch一遍,更新到本地系统的时间,再make就没问题了。
1 | CMake Warning (dev) at planners/pure_pursuit_local_planner/CMakeLists.txt:57 (add_dependencies): |
可能加一句1
2
3add_dependencies(${PROJECT_NAME}
${PROJECT_NAME}_gencfg
${PROJECT_NAME}_generate_messages_cpp)
第一个启动的 Tmux 窗口,编号是0,第二个窗口的编号是1,以此类推。
使用编号区分会话,不太直观,更好的方法是为会话起名 tmux new -s <session-name>
tmux ls命令可以查看当前所有的 Tmux 会话。
tmux attach命令用于重新接入某个已存在的会话。1
2
3
4
5# 使用会话编号
tmux attach -t 0
# 使用会话名称
tmux attach -t <session-name>
杀死某个会话1
2
3
4
5# 使用会话编号
tmux kill-session -t 0
# 使用会话名称
tmux kill-session -t <session-name>
tmux switch命令用于切换会话1
2
3
4
5# 使用会话编号
tmux switch -t 0
# 使用会话名称
tmux switch -t <session-name>