cmake教程(七) add_definitions设置编译参数

添加编译参数,例如:

  • add_definitions(-DDEBUG)将在gcc命令行添加 DEBUG 宏定义;
  • add_definitions(“-Wall -ansi –pedantic –g”)

编译时有时出现报警warning: extra ‘;’ [-Wpedantic],很影响看编译信息,可使用下面方法禁止pedantic

1
2
3
4
5
6
7
8
9
10
//save compiler switches
#pragma GCC diagnostic push
#pragma GCC diagnostic ignored "-Wpedantic"

//Bad headers with problem goes here
#include <ros/ros.h>
#include <sensor_msgs/LaserScan.h>

//restore compiler switches
#pragma GCC diagnostic pop

类似的报警还有warning: ISO C++ forbids variable length array ‘angle_compensate_nodes’ [-Wvla],把上面的"-Wpedantic"换成"-Wvla"即可


读写pbstream文件

保存文件

Node::SerializeState —— MapBuilder::SerializeState —— MapBuilder::SerializeState —— cartographer\io\internal\mapping_state_serialization.cc文件中的WritePbStream函数

实际是MapBuilderBridge::SerializeStateNode::HandleWriteState调用的也是这个函数。在最新版本里是bool MapBuilderBridge::SerializeState(const std::string& filename, const bool include_unfinished_submaps);

1
2
3
cartographer::io::ProtoStreamWriter writer(filename);
map_builder_->SerializeState(&writer);
return writer.Close();

然后是
1
2
3
4
5
6
void MapBuilder::SerializeState(bool include_unfinished_submaps,
io::ProtoStreamWriterInterface* const writer)
{
io::WritePbStream(*pose_graph_, all_trajectory_builder_options_, writer,
include_unfinished_submaps);
}

proto_stream.cc包含ProtoStreamWriterProtoStreamReader两个类,这里用的是类ProtoStreamWriter,在它的构造函数里以二进制方式,写入8个字节的魔术数以确定proto stream格式,

WritePbStream如下,这里的writer就是类ProtoStreamWriter

1
2
3
4
5
6
7
8
9
10
11
12
13
14
15
16
17
18
19
20
21
22
void WritePbStream(
const mapping::PoseGraph& pose_graph,
const std::vector<mapping::proto::TrajectoryBuilderOptionsWithSensorIds>&
trajectory_builder_options,
ProtoStreamWriterInterface* const writer, bool include_unfinished_submaps)
{
writer->WriteProto(CreateHeader());
writer->WriteProto(
SerializePoseGraph(pose_graph, include_unfinished_submaps));
writer->WriteProto(SerializeTrajectoryBuilderOptions(
trajectory_builder_options,
GetValidTrajectoryIds(pose_graph.GetTrajectoryStates())));

SerializeSubmaps(pose_graph.GetAllSubmapData(), include_unfinished_submaps,
writer);
SerializeTrajectoryNodes(pose_graph.GetTrajectoryNodes(), writer);
SerializeTrajectoryData(pose_graph.GetTrajectoryData(), writer);
SerializeImuData(pose_graph.GetImuData(), writer);
SerializeOdometryData(pose_graph.GetOdometryData(), writer);
SerializeFixedFramePoseData(pose_graph.GetFixedFramePoseData(), writer);
SerializeLandmarkNodes(pose_graph.GetLandmarkNodes(), writer);
}

保存的是子图、轨迹节点、轨迹数据、IMU数据、里程计、Landmark等等

ProtoStreamWriter保存数据时用到了common::FastGzipString函数,实质是boost::iostreams::gzip_compressor

读pbstream文件

这个就参考纯定位流程,Node::LoadState —— MapBuilderBridge::LoadState —— MapBuilder::LoadState

MapBuilderBridge::LoadState(const std::string& state_filename, bool load_frozen_state)使用ProtoStreamReader

1
2
cartographer::io::ProtoStreamReader stream(state_filename);
map_builder_->LoadState(&stream, load_frozen_state);

到了MapBuilder::LoadState,可以看出如果只是读pbstream文件,不需要实例化map_builder,除去加载数据到后端,把函数里的大部分内容提取出来即可,主要是类型io::ProtoStreamDeserializerproto::PoseGraph等等。

另外可以参考pbstream_main.cc


旭日x3中运行cartographer
abstract Welcome to my blog, enter password to read.
Read more
Docker的使用

安装Docker

1
2
3
4
5
6
7
8
# 添加docker的GPG公匙
curl -fsSL https://mirrors.ustc.edu.cn/docker-ce/linux/ubuntu/gpg | sudo apt-key add -
# 添加中科大源
sudo add-apt-repository "deb [arch=amd64] https://mirrors.ustc.edu.cn/docker-ce/linux/ubuntu $(lsb_release -cs) stable"
sudo apt-get update
apt-cache policy docker-ce
sudo apt-get install -y docker-ce
docker version #查看版本

常用操作

1
2
3
4
5
6
7
8
9
10
11
# 显示所有容器
sudo docker image ls
sudo docker ps -a
# 启动已经停止的容器
docker start ed86d97c09bd
# 停止容器
docker stop ed86d97c09bd
# 进入容器
sudo docker exec -it ed86d97c09bd /bin/bash
# 删除容器
docker rm -f ed86d97c09bd


使用UDPROS进行通信

TCPROS是ROS默认使用的传输方式。另一种通信类型是 UDPROS,这种方式是一种低延迟、非可靠的传输,仅适用于远程操作。

在发布的消息头中,在发布消息之前将当前时间戳写到timeStamp中,然后在订阅器的回调函数中再计算消息中的timeStamp到当前时间的Duration,这样子能够大概计算这个经过的时间;实际上网络延迟会比这个Duration稍微短一点。

更换为UDP 通信只需要在 ros::Subscriber 的构造函数最后加上ros::TransportHints().unreliable().maxDatagramSize(1000) 即可。

  • 随着频率的增加,通信延迟也相应增加
  • 在UDP通信中,随着maxDatagramSize的增加,通信延迟也随着降低。
  • 随着订阅者数量增加,通信延迟也会增加。

参考:
Transport Hints
UDPROS


纯定位机制的流程

纯定位其实就是SLAM,只是不保存所有子图。因为node_main.cc里会先要运行map_builder,然后再是node.LoadState,最后StartTrajectoryWithDefaultTopics进行建图

Node::LoadState(const std::string& state_filename, const bool load_frozen_state) —— map_builder_bridge_.LoadState —— map_builder.LoadState

MapBuilder::AddTrajectoryBuilder中有一句MaybeAddPureLocalizationTrimmer(trajectory_id, trajectory_options, pose_graph_.get() );,实际就是

1
2
3
4
5
6
if (trajectory_options.has_pure_localization_trimmer()) 
{
pose_graph->AddTrimmer(absl::make_unique<PureLocalizationTrimmer>(
trajectory_id,
trajectory_options.pure_localization_trimmer().max_submaps_to_keep() ) );
}

PureLocalizationTrimmer这个类的解释就是 Keeps the last num_submaps_to_keep of the trajectory with trajectory_id to implement localization without mapping.

初值的处理

1
2
3
4
5
6
7
8
9
if (trajectory_options.has_initial_trajectory_pose())
{
const auto& initial_trajectory_pose =
trajectory_options.initial_trajectory_pose();
pose_graph_->SetInitialTrajectoryPose(
trajectory_id, initial_trajectory_pose.to_trajectory_id(),
transform::ToRigid3(initial_trajectory_pose.relative_pose()),
common::FromUniversal(initial_trajectory_pose.timestamp()) );
}

这里涉及到PoseGraph2D::SetInitialTrajectoryPose,其实就一句 data_.initial_trajectory_poses[from_trajectory_id] = InitialTrajectoryPose{to_trajectory_id, pose, time};

MapBuilder::LoadState

先是轨迹ID的增加

1
2
3
4
5
6
7
8
9
10
11
12
13
14
15
16
17
18
19
20
std::map<int, int> trajectory_remapping;
for (int i = 0; i < pose_graph_proto.trajectory_size(); ++i)
{
auto& trajectory_proto = *pose_graph_proto.mutable_trajectory(i);
const auto& options_with_sensor_ids_proto =
all_builder_options_proto.options_with_sensor_ids(i);
// 新的轨迹id
const int new_trajectory_id =
AddTrajectoryForDeserialization(options_with_sensor_ids_proto);

CHECK(trajectory_remapping
.emplace(trajectory_proto.trajectory_id(), new_trajectory_id)
.second)
<< "Duplicate trajectory ID: " << trajectory_proto.trajectory_id();
trajectory_proto.set_trajectory_id(new_trajectory_id);

if (load_frozen_state) {
pose_graph_->FreezeTrajectory(new_trajectory_id);
}
}

然后从pbstream文件添加轨迹,更新约束中节点和子图的轨迹id,从获取的pose graph生成 submap_posesnode_poses,将landmark_poses添加到pose graph,向pose graph添加各类信息,添加子图的附属节点。

以添加子图为例

1
2
3
4
5
6
7
8
9
10
11
12
13
14
15
16
17
18
19
20
21
22
23
24
25
26
27
28
29
30
31
32
33
io::ProtoStreamDeserializer deserializer(reader);

// Create a copy of the pose_graph_proto, such that we can re-write the
// trajectory ids.
proto::PoseGraph pose_graph_proto = deserializer.pose_graph();
const auto& all_builder_options_proto =
// 子图位姿
MapById<SubmapId, transform::Rigid3d> submap_poses;
for (const proto::Trajectory& trajectory_proto :
pose_graph_proto.trajectory())
{
for (const proto::Trajectory::Submap& submap_proto :
trajectory_proto.submap())
{
submap_poses.Insert(SubmapId{trajectory_proto.trajectory_id(),
submap_proto.submap_index()},
transform::ToRigid3(submap_proto.pose()));
}
}
MapById<SubmapId, mapping::proto::Submap> submap_id_to_submap;
// while 读子图数据
proto.mutable_submap()->mutable_submap_id()->set_trajectory_id(
trajectory_remapping.at(
proto.submap().submap_id().trajectory_id()));
submap_id_to_submap.Insert(
SubmapId{proto.submap().submap_id().trajectory_id(),
proto.submap().submap_id().submap_index()},
proto.submap());
// 进入后端
for (const auto& submap_id_submap : submap_id_to_submap) {
pose_graph_->AddSubmapFromProto(submap_poses.at(submap_id_submap.id),
submap_id_submap.data);
}

后端的处理

1
2
3
4
5
6
7
8
9
10
void PoseGraph2D::AddTrimmer(std::unique_ptr<PoseGraphTrimmer> trimmer)
{
PoseGraphTrimmer* const trimmer_ptr = trimmer.release();
AddWorkItem([this, trimmer_ptr]() LOCKS_EXCLUDED(mutex_)
{
absl::MutexLock locker(&mutex_);
trimmers_.emplace_back(trimmer_ptr);
return WorkItem::Result::kDoNotRunOptimization;
});
}

这里作为WorkItem加入到了队列里,到了HandleWorkQueue才处理

1
2
3
4
5
6
7
8
9
10
11
12
13
14
// 纯定位时,子图的裁剪,如果没有裁剪器就不裁剪
TrimmingHandle trimming_handle(this);
for (auto& trimmer : trimmers_)
{
// 这里实际就是 PureLocalizationTrimmer::Trim
trimmer->Trim(&trimming_handle);
}
// 裁剪器完成状态,删除裁剪器
trimmers_.erase(
std::remove_if(trimmers_.begin(), trimmers_.end(),
[](std::unique_ptr<PoseGraphTrimmer>& trimmer) {
return trimmer->IsFinished();
}),
trimmers_.end());

这里的裁剪子图就是PureLocalizationTrimmer::Trim
1
2
3
4
5
6
7
8
9
10
11
12
13
14
15
16
17
18
19
20
21
22
23
void PureLocalizationTrimmer::Trim(Trimmable* const pose_graph)
{
// trajectory 是FINISHED状态,或者没有 trajectory
if (pose_graph->IsFinished(trajectory_id_)) {
num_submaps_to_keep_ = 0;
}
// 实际调用 TrimmingHandle::GetSubmapIds
auto submap_ids = pose_graph->GetSubmapIds(trajectory_id_);
// 从序列号0开始裁剪子图,并删除相关的约束和节点
// 剩下序列号大的子图
for (std::size_t i = 0; i + num_submaps_to_keep_ < submap_ids.size(); ++i)
{
// 这是个大函数
pose_graph->TrimSubmap(submap_ids.at(i) );
}
if (num_submaps_to_keep_ == 0)
{
finished_ = true;
pose_graph->SetTrajectoryState(
trajectory_id_,
PoseGraphInterface::TrajectoryState::DELETED );
}
}

GetSubmapIds有必要学习
1
2
3
4
5
6
7
8
9
10
11
12
std::vector<SubmapId> PoseGraph2D::TrimmingHandle::GetSubmapIds(
int trajectory_id) const
{
std::vector<SubmapId> submap_ids;
// PoseGraph2D* const parent_;
const auto& submap_data = parent_->optimization_problem_->submap_data();
for (const auto& it : submap_data.trajectory(trajectory_id) )
{
submap_ids.push_back(it.id);
}
return submap_ids;
}

核心是pose_graph->TrimSubmap,函数太长了,功能如下:

  • 获取除submap_id外的所有子图的所有节点的id(nodes_to_retain),这些节点是需要保留的
  • 找到在submap.id的子图内部,同时不在别的子图内的节点(nodes_to.remove),这些节点需要删除
  • 删除submap_id相关的约束
  • 删除与nodes_to_remove中节点相关联的约束,并对对应的submap_id进行标记
  • 对标记的submap_id进行检查,看是否还存在其他子图间约束
  • 删除没有子图间约束的标记的子图的扫描匹配器
  • 删除submap_id这个子图的指针
  • 删除submap_id这个子图的匹配器,与多分辨率地图
  • 删除optimization_problem_中的submap_id这个子图
  • 删除nodes_to_remove中的节点

纯定位时的匹配流程

PoseGraph2D::ComputeConstraint(node_id, submap_id) —— ConstraintBuilder2D::MaybeAddGlobalConstraint(submap_id, submap, node_id, constant_data) —— ConstraintBuilder2D::ComputeConstraint

第2步中

1
2
3
4
// 分别根据 node_id 和 submap_id 获得 节点数据和子图
const TrajectoryNode::Data* constant_data = data_.trajectory_nodes.at(node_id).constant_data.get();
const Submap2D* submap = static_cast<const Submap2D*>(data_.submap_data.at(submap_id).submap.get() );

第3步中,submap唯一的作用是获得初值:

1
2
const transform::Rigid2d initial_pose =
ComputeSubmapPose(*submap) * initial_relative_pose;

这里就想到那句话:前端建图,后端并不改变子图本身,只改变位姿。


旭日x3使用记录

ARM 8架构或者说aarch64,由于SD卡空间小,不能像以前那样随意装软件包。

安装

按着网上的说明一步步安装即可,包括SD卡的烧录。我开始犯了个低级错误,把SD卡插在读卡器上,把读卡器插到USB口上启动了,结果板子一直是绿灯。没有用开发板的习惯,在工控机上用惯了,换到卡槽上就好了。

网络

外接天线直接可以插到插孔上,并不复杂。但是发现wifi连接很不稳定,时不时掉线,于是还是决定用有线,同时取消开机连接wifi

温度

装好风扇后,上电发现风扇动了一下就停了,拆装了多少遍,结果仍然无效,后来看说明书才发现要运行程序。后来直接用电风扇吹,发现CPU很快降了十几度,目前只是单用开发板,所以干脆先不装风扇了。

watch -n1 hrut_somstatus 用于实时查询温度传感器读数及 CPU/BPU 频率实时信息

1
2
3
4
5
6
7
8
9
10
11
12
13
=====================1=====================
temperature-->
CPU : 72.8 (C)
cpu frequency-->
min cur max
cpu0: 240000 1200000 1200000
cpu1: 240000 1200000 1200000
cpu2: 240000 1200000 1200000
cpu3: 240000 1200000 1200000
bpu status information---->
min cur max ratio
bpu0: 400000000 1000000000 1000000000 100
bpu1: 400000000 1000000000 1000000000 100

扩大swap内存

free -m可查看swap内存

先确定swapfile存放的路径,之后执行

1
2
3
4
5
6
fallocate -l 6G swapfile
chmod 600 swapfile
# 如果不设置开机加载,重启后,只执行下面两个命令
mkswap swapfile
sudo swapon swapfile
swapfile -s

这样就成功了,但是开机启动时不会加载,还要修改/etc/fstab,但一般不需要

ROS环境部署

后来发现启动rviz会报错,之前只启动乌龟程序,看来以后装完ROS也得启动Rviz。内容如下

1
2
3
4
5
6
7
8
9
10
11
12
13
[ INFO] rviz version 1.14.19
[ INFO] compiled against Qt version 5.12.8
[ INFO] compiled against OGRE version 1.9.0 (Ghadamon)
[ INFO] Forcing OpenGl version 0.

libEGL warning: DRI2: failed to authenticate

libEGL warning: MESA-LOADER: failed to open swrast (search paths /usr/lib/aarch64-linux-gnu/dri:\$${ORIGIN}/dri:/usr/lib/dri)
libEGL warning: DRI2: failed to authenticate
libEGL warning: MESA-LOADER: failed to open swrast (search paths /usr/lib/aarch64-linux-gnu/dri:\$${ORIGIN}/dri:/usr/lib/dri)
Segmentation fault

正常的输出是这样:
1
2
3
4
5
6
7
[ INFO] rviz version 1.13.21
[ INFO] compiled against Qt version 5.9.5
[ INFO] compiled against OGRE version 1.9.0 (Ghadamon)
[ INFO] Forcing OpenGl version 0.
[ INFO] Stereo is NOT SUPPORTED
[ INFO] OpenGL device: SVGA3D; build: RELEASE; LLVM;
[ INFO] OpenGl version: 3.3 (GLSL 3.3) limited to GLSL 1.4 on Mesa system.

安装glxinfo工具:sudo apt-get install -y mesa-utils,然后执行glxinfo,应当出现很多内容,而我的只有
1
2
name of display: :0.0
Error: couldn't find RGB GLX visual or fbconfig

而在x86上执行glxinfo | grep OpenGL 可以看到有一行结果: OpenGL ES profile version string: OpenGL ES 2.0 Mesa 20.0.8

查论坛发现x3派不支持openGL,所以看来 不能使用rviz了

编译 cartographer

编译cartographer出错, absl库出错
这是因为这个库我是从其他电脑拷贝过来的,不是ARM架构编译的,还是要重新编译。

继续编译时遇到了PCL的报错

PCLConfig.cmake的772行

1
2
3
4
5
6
7
8
9
10
11
12
13
14
15
16
17
18
19
20
21
22
23
24
25
if(EXISTS "${PCL_ROOT}/include/pcl-${PCL_VERSION_MAJOR}.${PCL_VERSION_MINOR}/pcl/pcl_config.h")
# Found a PCL installation
# pcl_message("Found a PCL installation")
set(PCL_INCLUDE_DIRS "${PCL_ROOT}/include/pcl-${PCL_VERSION_MAJOR}.${PCL_VERSION_MINOR}")
set(PCL_LIBRARY_DIRS "${PCL_ROOT}/lib/x86_64-linux-gnu")
if(EXISTS "${PCL_ROOT}/3rdParty")
set(PCL_ALL_IN_ONE_INSTALLER ON)
endif(EXISTS "${PCL_ROOT}/3rdParty")
elseif(EXISTS "${PCL_ROOT}/include/pcl/pcl_config.h")
# Found a non-standard (likely ANDROID) PCL installation
# pcl_message("Found a PCL installation")
set(PCL_INCLUDE_DIRS "${PCL_ROOT}/include")
set(PCL_LIBRARY_DIRS "${PCL_ROOT}/lib")
if(EXISTS "${PCL_ROOT}/3rdParty")
set(PCL_ALL_IN_ONE_INSTALLER ON)
endif(EXISTS "${PCL_ROOT}/3rdParty")
elseif(EXISTS "${PCL_DIR}/include/pcl/pcl_config.h")
# Found PCLConfig.cmake in a build tree of PCL
# pcl_message("PCL found into a build tree.")
set(PCL_INCLUDE_DIRS "${PCL_DIR}/include") # for pcl_config.h
set(PCL_LIBRARY_DIRS "${PCL_DIR}/lib/x86_64-linux-gnu")
set(PCL_SOURCES_TREE "/build/pcl-OilVEB/pcl-1.8.1+dfsg1")
else(EXISTS "${PCL_ROOT}/include/pcl-${PCL_VERSION_MAJOR}.${PCL_VERSION_MINOR}/pcl/pcl_config.h")
pcl_report_not_found("PCL can not be found on this machine") # 这里报错
endif(EXISTS "${PCL_ROOT}/include/pcl-${PCL_VERSION_MAJOR}.${PCL_VERSION_MINOR}/pcl/pcl_config.h")

结果发现我没有pcl_config.h,在x86上发现在/usr/include/pcl-1.8/pcl/pcl_config.h

编译PCL

一开始发现其实已经安装好了PCL,但是缺cmake文件。比如x86的主机上有路径/usr/lib/x86_64-linux-gnu/cmake/pcl,包含PCLConfig.cmakePCLConfigVersion.cmake。旭日上并没有这个路径,显然需要的路径是/usr/lib/aarch64-linux-gnu/cmake/pcl

旭日默认存在的pcl相关文件在/usr/bin中的pcl_开头的文件,以及/usr/lib/aarch64-linux-gnu/中以libpcl_开头的so文件,对应x86的路径在 /usr/lib/x86_64-linux-gnu/

编译PCL要很久很久,尤其到后面编译Building CXX object surface/CMakeFiles/pcl_surface.dir/src/mls.cpp.o时,一直编译不过。编译PC主要是消耗内存很大,CPU其实占用很少。所以生成swap内存尽量大一些,至少6G

编译完成后,把上面提到的两个cmake文件复制到/usr/lib/aarch64-linux-gnu/cmake/pcl,在/usr/local/lib中有很多大文件,超过100M的有

1
2
3
4
5
6
7
/usr/local/lib/libpcl_sample_consensus.so.1.10.0
/usr/local/lib/libpcl_filters.so.1.10.0
/usr/local/lib/libpcl_features.so.1.10.0
/usr/local/lib/libpcl_segmentation.so.1.10.0
/usr/local/lib/libpcl_surface.so.1.10.0
/usr/local/lib/libpcl_registration.so.1.10.0
/usr/local/lib/libpcl_recognition.so.1.10.0

重新编译cartographer,就可以成功了。

参考:
旭日x3派上电记录
串口驱动安装
PCL交叉编译


概述

常规的动态物体过滤方法按策略可以分为两类:(一)SLAM过程中在线去除动态点云,考虑了过往帧的信息(局部信息);(二)用后处理的方式,考虑整个地图提供的信息(全局信息),去除动态点云。

第一类策略可以细分为以下三种方法

  1. segmentation-based。该类方法通常基于聚类,比如,Litomisky等人基于确定视角下的特征分布直方图(VFH, Viewpoint Feature Histogram)来从静态聚类中区分出动态聚类;Yin等人则认为相邻帧配准过程中匹配误差较大的点很可能是动态点,用这些点作为种子进行区域生长,搜索出的聚类既是动态聚类;此外,Yoon等人也提出了一种基于区域生长过滤动态聚类的方案。基于分割的方法中不得不提的还有基于深度学习的语义分割方法(deep-learning based semantic segmentation),语义分割直接label出了哪些点是动态物体,建图算法只需要直接弃掉这些点即可,简单粗暴。但是,深度学习只能分割出训练过的动态类别,对其它类别的动态物体则无能为力。

  2. ray tracing based method 这类方法非常典型地要结合栅格去实现,可以是普通的占据栅格或者八叉树栅格。其基本原理是,激光点打到的cell,hits计数+1,激光光束穿过的cell,misses计数+1,通过hits和misses计算cell的占据概率,占据概率低于阈值,则抹除掉这个cell内的所有点。这种方法利用了动态点只会短暂地hit到某个cell,这个cell在随后的大部分时间里都会被miss的特点。这种方法的 缺点是消耗计算资源,因为一个激光点不仅产生了一个hit,同时又产生非常多的misses。当然,这个方法也可以用后处理的方式去做,比如Cartographer 3D

  3. visibility-based (基于可见性的方法)。这类方法的基本假设是:如果一个新激光点会穿过某个旧激光点的位置(共线),那么这个旧激光点就是动态点。这个假设逻辑上说得通,但实现起来有两个问题:其一,入射角接近90度时的误杀问题,如下图所示,红色箭头指向的旧点因为与新激光点(五角星)光路很接近,会被误杀掉,考虑到激光点测量本身的角度误差、测距误差、光斑影响等,这种误杀会更严重。其二,遮挡问题,比如对于一些大型动态物体,它们完全挡住了激光雷达的视线,激光雷达没有机会看到这些动态物体后方的静态物体,意味着这些动态点永远不会被新的激光点穿过,此时就绝无可能把这些动态点滤除掉了。

cartographer处理动态障碍的逻辑太简单了,效果不好,需要研究其他方法。


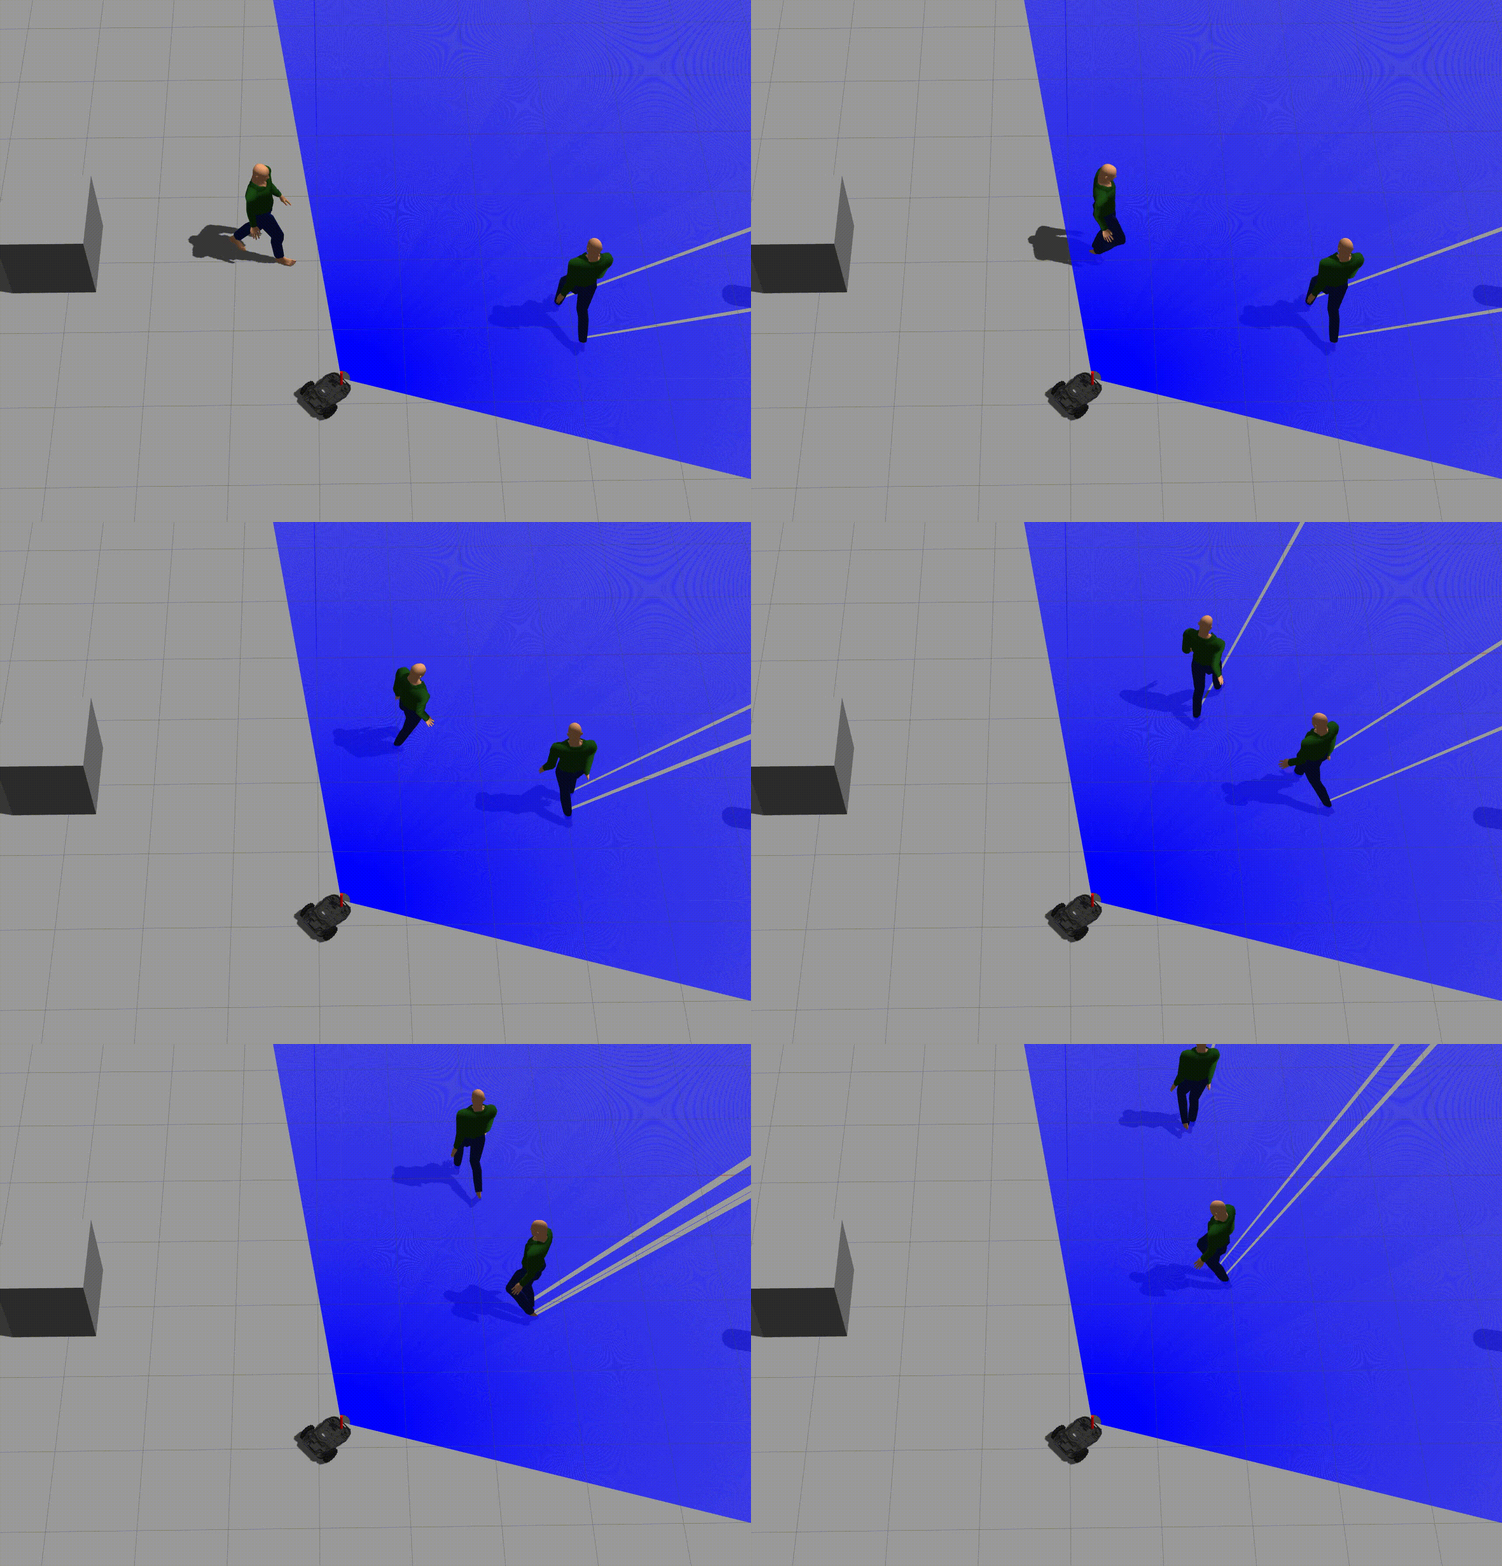
使用obstacle_detector过滤动态障碍

The obstacle_detector package provides utilities to detect and track obstacles from data provided by 2D laser scanners. Detected obstacles come in a form of line segments or circles. The package was designed for a robot equipped with two laser scanners therefore it contains several additional utilities.

这个包也可以用于合并scan

算法顺序: two laser scans -> scans merger -> merged scan or pcl -> obstacle extractor -> obstacles -> obstacle tracker -> refined obstacles

resulting laser scan divides the area into finite number of circular sectors and put one point (or actually one range value) in each section occupied by some measured points

This node converts messages of type sensor_msgs/LaserScan from topic scan or messages of type sensor_msgs/PointCloud from topic pcl into obstacles which are published as messages of custom type obstacles_detector/Obstacles under topic raw_obstacles.

  • obstacle_tracker node

使用卡尔曼滤波追踪和过滤圆形障碍,订阅消息类型obstacle_detector/Obstacles from topic raw_obstacles and publishes messages of the same type under topic tracked_obstacles. The tracking algorithm is applied only to the circular obstacles, hence the segments list in the published message is simply a copy of the original segments. The tracked obstacles are supplemented with additional information on their velocity.

自定义的消息

  • CircleObstacle
1
2
3
4
5
6
7
8
// center of circular obstacle,
geometry_msgs/Point center
// linear velocity of circular obstacle,
geometry_msgs/Vector3 velocity
// radius of circular obstacle with added safety margin,
float64 radius
// measured radius of obstacle without the safety margin.
float64 true_radius
  • SegmentObstacle
1
2
3
4
// first point of the segment (in counter-clockwise direction)
geometry_msgs/Point first_point
// end point of the segment
geometry_msgs/Point last_point
  • Obstacles
1
2
3
Header header
obstacle_detector/SegmentObstacle[] segments
obstacle_detector/CircleObstacle[] circles

obstacle_detector也有一定误检测概率,可能把真实静态障碍检测为行人。

参考:
Github的obstacle_detector
Cartographer行人点云过滤建图
Paper Review: Detection and Tracking of 2D Geometric Obstacles from LRF Data


carto建图时去除动态障碍

cartographer的内容实在太庞大了,还有去除建图时动态障碍的模块。

在使用Cartographer建图时,存在环境中行人较多,或者建图时机器人周围人员一直跟随,导致最终建图后地图上存在行人噪点。

Cartographer在构建submap以及整体map时,实质是对栅格地图概率的更新,每一个node在栅格概率上的累加,可以去除建图时一般移动物体所产生的噪点。只要不是长时间停留在雷达探测范围内,栅格地图的概率会及时更新,最终生成的地图不会带有行人和车辆。但是实际建图中经常会出现多人跟在机器人周围建图或恰巧机器人旋转时周围人为移动,旋转时node快速生成,导致该部分submap中存在行人噪点,如果后期不重复走这条路径,最终生成的map会存在噪点,影响地图美观,以及路径规划是被视为障碍物。

cartographer在建图后比较每个栅格被击中和被路过的次数来判断动静态栅格。参数voxel_filter_and_remove_moving_objects和类OutlierRemovingPointsProcessor,可以用来配置Voxel过滤数据,并仅传递我们认为在非运动对象上的点。

追本溯源,发现这一机制只在cartographer_assets_writer中,顺序是 assets_writer_main.cc —— assets_writer.cc —— points_processor_pipeline_builder.cc中的RegisterBuiltInPointsProcessors —— OutlierRemovingPointsProcessor

cartographer_assets_writer 使用.bag中的数据团和.pbstream中的轨迹. 配置文件可以用来上色,过滤,导出SLAM点云数据成不同的格式。

逻辑

其实很简单,有三个阶段,筛选出 hit > 0 的 voxel,计算经过这些voxel的 rays-cast 次数,可以按miss集合理解,然后比较rays和hits数目关系

1
2
3
4
5
6
7
8
9
10
11
12
13
// 第二阶段
// 如果栅格之前的 hit>0,那么就 ray 次数增加
if (voxels_.value(index).hits > 0)
{
++voxels_.mutable_value(index)->rays;
}

// 第三阶段
// 如果点的 rays > 3*hits 那么就认为是动态障碍物
if (!(voxel.rays < miss_per_hit_limit_ * voxel.hits))
{
to_remove.insert(i);
}

这个逻辑有点过于简单了,如果一个栅格被障碍占据,那么rays为0,全是hits,不是动态障碍。如果rays次数过多,就认为是假障碍,进行清除。

运行

assets_writer_backup_2d.launch如下

1
2
3
4
5
6
7
8
9
10
11
12
<launch>
<arg name="config_file" default="assets_writer_backpack_2d.lua"/>
<node name="cartographer_assets_writer" pkg="cartographer_ros" required="true"
type="cartographer_assets_writer" args="
-configuration_directory $(find cartographer_ros)/configuration_files
-configuration_basename $(arg config_file)
-urdf_filename $(find cartographer_ros)/urdf/backpack_2d.urdf
-bag_filenames $(arg bag_filenames)
-pose_graph_filename $(arg pose_graph_filename)"
output="screen">
</node>
</launch>

参考:如何使用Cartographer生成的地图