互斥锁
在多线程的情况下,当一个变量可以被多个线程修改时,就需要考虑多线程同步问题。线程A修改变量前,先加锁,修改结束再解锁,然后线程B获取同样的锁,修改结束再解锁,如果不是同一把锁,同步是无效的。
在C++中使用pthread的互斥量接口实现数据同步,线程A对互斥量mutex加锁后,其他尝试加锁的线程都会阻塞,等线程A解锁后,其他线程从阻塞变为运行态,第一个抢到CPU的线程加锁成功,其他线程再次阻塞,这样每次只有一个线程能加锁。这里存在规则统一的问题,就是线程可以在不加锁情况下访问变量,此时即使另一个线程加了锁,还是会出现不同步的问题,所以不能有的线程需要加锁,有的线程不需要加锁,必须统一化。
缺点:
- 重复锁定和解锁,每次都会检查共享数据结构,浪费时间和资源;
- 繁忙查询的效率非常低;
互斥锁的程序如下,注意两个线程的join是在两个线程定义之后运行1
2
3
4
5
6
7
8
9
10
11
12
13
14
15
16
17
18
19
20
21
22
23
24
25
26
27
28
29
30
31
32
33
34
35
36
using namespace std;
boost::mutex myLock;
unsigned sum = 10;
void thread_1(int n)
{
myLock.lock();
sum = sum * n;
sleep(2);
cout<<"thread 1, sum: "<< sum <<endl;
myLock.unlock();
}
void thread_2(int n)
{
sleep(1);
myLock.lock();
sum = sum * 7 * n;
cout<<"thread 2, sum: "<< sum <<endl;
myLock.unlock();
}
int main()
{
unsigned int n = 2;
boost::thread th_1 = boost::thread(boost::bind(&thread_1,n));
boost::thread th_2 = boost::thread(boost::bind(&thread_2,n));
th_1.join();
th_2.join();
return 0;
}
不加互斥锁的情况下,运行结果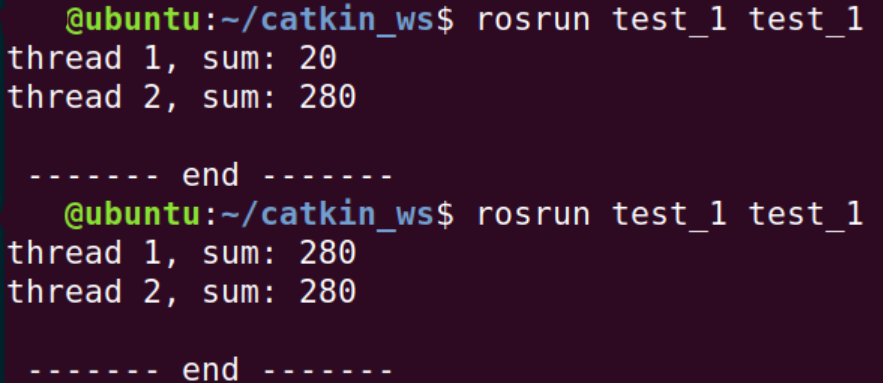
调试时,我发现mutex的lock和unlock应当包括cout,否则执行顺序还是不确定。
try_lock
解释一下try_lock的特点,它试图取得一个lock,成功就返回true, 失败就返回false. 但是失败也不会阻塞。
If try_lock is called by a thread that already owns the mutex, the behavior is undefined.
程序如下1
2
3
4
5
6
7
8
9
10
11
12
13
14
15
16
17
18
19
20
21
22
23
24
25
26
27
28
29
30
31
32
33
34
35
36
37
using namespace std;
boost::mutex myLock;
unsigned sum = 10;
void thread_1(int n)
{
cout << "start thread 1" << endl;
myLock.lock();
sum = sum * n;
cout<<"thread 1, sum: "<< sum <<endl;
// myLock.unlock();
}
void thread_2(int n)
{
cout << "start thread 2" << endl;
myLock.lock();
// myLock.try_lock();
sum = sum * 7 * n;
cout<<"thread 2, sum: "<< sum <<endl;
myLock.unlock();
}
int main()
{
unsigned int n = 2;
boost::thread th_1 = boost::thread(boost::bind(&thread_1, n) );
boost::thread th_2 = boost::thread(boost::bind(&thread_2, n) );
th_1.join();
th_2.join();
return 0;
}
运行结果是1
2
3start thread 1
thread 1, sum: 20
start thread 2
显然线程1的最后没有unlock互斥锁,线程2获取互斥锁失败,会阻塞。
如果在线程2中改用try_lock,就不会阻塞,运行结果是1
2
3
4start thread 1
thread 1, sum: 20
start thread 2
thread 2, sum: 280
或者1
2
3
4start thread 1start thread 2
thread 1, sum:
thread 2, sum: 280
20
是不会阻塞,但会出现我们不想要的结果。
参考: C++ 多线程互斥锁