
setlocale(LC_ALL, "");
1 | double x=ros::Time::now().toSec(); //把时间戳转化成浮点型格式 |
跨平台函数 bool get_environment_variable (std::string &str, const char *environment_variable)
1 | template<class T> |
base_link 坐标系下1 | // 注意最后一个路径点,是 end() 的前一个点 |
1 | bool transformPose( |
1 | double quaternionToYaw(const geometry_msgs::Quaternion& quat) |
1 | //只通过yaw计算四元数,用于平面小车 |
ros::this_node::getName()
bool ros::master::getNodes (V_string &nodes) 是获得当前所有运行的节点,效果和rosnode list一样。但这里有个缺陷,使用pkill杀死的节点,在rosnode list里仍然能看到,实际已经退出了。
调用g2o::normalize_theta(double theta)或者1
2
3
4
5
6
7void normAngle ( double& angle )
{
if( angle >= M_PI)
angle -= 2 * M_PI;
if( angle < -M_PI)
angle += 2 * M_PI;
}
1 | bool robotIsStill() |
1 | geometry_msgs::Twist cmd_vel; |
1 | tf::Stamped<tf::Pose> robot_vel_tf; |
1 | //get the starting pose of the robot |
还有类似的函数: poseTFToMsg 和 transformMsgToTF
angles包static double from_degrees (double degrees): Convert degrees to radians
static double normalize_angle (double angle)
static double shortest_angular_distance (double from, double to)
static double to_degrees (double radians): Convert radians to degrees
static double two_pi_complement (double angle): returns the angle in [-2*M_PI, 2*M_PI] going the other way along the unit circl
tf的命名空间有很多有用的函数,先列出一部分:
Return the half angle between two quaternions
Return the shortest angle between two quaternions
Throw InvalidArgument if quaternion is malformed
Throw InvalidArgument if quaternion is malformed
TFSIMD_FORCE_INLINE Quaternion shortestArcQuatNormalize2 (Vector3 &v0, Vector3 &v1)
Return the result of spherical linear interpolation betwen two quaternions
std::string strip_leading_slash (const std::string &frame_name)
TFSIMD_FORCE_INLINE tfScalar tfAngle (const Vector3 &v1, const Vector3 &v2)
Return the angle between two vectors
Return the cross product of two vectors
Return the distance between two vectors
Return the distance squared between two vectors
Return the dot product between two vectors
geometry_msgs::PoseStamped MoveBase::goalToGlobalFrame(const geometry_msgs::PoseStamped& goal_pose_msg)
这个函数的核心功能是获得机器人坐标系和全局地图坐标系的关系:1
tf_.transformPose(global_frame, goal_pose, global_pose);
1 | std::vector<geometry_msgs::Point> footprint = planner_costmap_ros_->getRobotFootprint(); |
与上一条结合,参考TEB代码1
2
#include <math.h>
double hypot(double x, double y),输入是两个直角边,用法: hypot(p1.x - p2.x, p1.y - p2.y)
关闭节点并且从主节点登出,会终结所有的订阅、发布、服务,连ROS_INFO也不能再用。一般不用调用此函数,当所有的NodeHandle销毁时,就会自动关闭节点。默认的roscpp也会安装SIGINT句柄用来检测Ctrl-C,并自动为你关闭节点。
等待节点关闭,无论时通过Ctrl-C还是ros::shutdown()
一旦ros::shutdown()调用(注意是刚开始调用,而不是调用完毕)就返回true。一般建议用ros::ok(),特殊情况可以用ros::isShuttingDown()
获取节点的句柄,ros::init是初始化节点,这个是启动节点。
如果不想通过对象的生命周期来管理节点的开始和结束,可以通过ros::start()和ros::shutdown()来自己管理节点。
判断是否退出节点,如果返回false,说明可能发生了以下事件
ros::shutdown()ros::NodeHandles都已经被销毁获取当前时间: ros::Time time = ros::Time::now()
使用模拟时间时,当 /clock节点接受到第一条消息时,ros::Time::now()返回时刻 0,此时客户端还不知道时钟时间。
1 | ros::Rate rate(10); |
Rate类的构造函数参数是频率,不是时间。rate(10)对应时间间隔为1/10秒,也就是100毫秒。Rate::sleep()是进行睡眠,实际调用Duration::sleep(),间隔就是从构造函数开始计算,源码处理比较复杂。
1 | typedef std::vector<std::string> ros::V_string |
用这个函数很简单:1
2
3
4
5
6
7std::vector<std::string> nodes;
ros::master::getNodes(nodes); // bool
int len = nodes.size();
for (int i =0; i < len; i ++)
{
cout<<"node: "<<nodes.at(i)<<endl;
}
1 | struct ros::master::TopicInfo |
使用是类似的:1
2
3
4
5
6
7
8std::vector<ros::master::TopicInfo> topics;
ros::master::getTopics(topics);
int len = topics.size();
for (int i =0; i < len; i ++)
{
cout<<"topic: "<<topics.at(i).name<<" type: "
<<topics.at(i).datatype<<endl;
}
1 | ros::isInitialized () // 判断ros::init()是否被调用 |

参考:
ros 初始化和关闭
在话题发布和订阅中,消息订阅器一旦知道话题上面有消息发布,就会将消息的值作为参数传入回调函数中,把回调函数放到了一个回调函数队列中,它们的函数名一样,只是实参不一样,这就是subscribe函数的作用。但是此时还没有执行callback函数,当spinOnce函数被调用时,spinOnce就会调用回调函数队列中第一个callback函数,此时回调函数才被执行,然后等到下次spinOnce函数又被调用时,回调函数队列中第二个回调函数就会被调用,以此类推。
注意:因为回调函数队列的长度是有限的,如果发布数据的速度太快,spinOnce函数调用的频率太少,就会导致队列溢出,一些回调函数就会被挤掉,导致没被执行。
对于spin函数,一旦进入spin函数,它就不会返回了,相当于它在自己的函数里阻塞。只要回调函数队列里面有回调函数在,它就会马上去执行。如果没有的话,它就会阻塞,不会占用CPU。
spin()的目的是启动一个新的线程去获取队列中的回调函数并调用它,而回调函数本身不是线程 ,有单线程,同步多线程和异步多线程等情况,这些都有内置的语句。所有用户的调用程序将从 ros::spin()开始调用,只到节点关闭,ros::spin()才有返回值。
ros::spin其实就相当于1
2
3
4
5while(ros::ok())
{
// Do Something
ros::spinOnce();
}
发布和订阅话题都不一定要使用spinOnce(),如果仅仅只是响应topic,就用ros::spin(),当程序中除了响应回调函数还有其他重复性工作的时候,那就在循环中做那些工作,然后调用ros::spinOnce()
ros::spinOnce()的用法相对来说很灵活,但往往需要考虑调用消息的时机,调用频率,以及消息池的大小。
比如下面的程序,消息送达频率为10Hz,ros::spinOnce()的调用频率为5Hz,那么消息池的大小就一定要大于2,才能保证数据不丢失,无延迟,跟这里的发布消息池容量无关
1 | //发送频率为10Hz(1秒发10次) 消息池最大容量1000。 |
看一下源码:1
2
3
4void spinOnce()
{
g_global_queue->callAvailable(ros::WallDuration());
}
调用队列中的所有回调函数,如果一个回调还没有准备好调用,再推回队列
话题通信的媒介是消息,消息的产生和消费是解偶的,二者之间没有强行绑定的关系,ROS节点不在乎是谁在发布Topic,哪个节点在订阅Topic,它只关心topic的名字以及当前的消息类型时候和要求的匹配。所以说话题通信是多对多的方式
publisher注册时的消息类型,如果和发布时的消息类型不一致,编译不报错,运行报错
消息是以Boost共享指针的形式传输,我们可以存储它而又不需要复制数据。回调函数最常用的原型是这样的:1
void callback(const std_msgs::StringConstPtr& str)
其实它就是void callback(const boost::shared_ptr<std_msgs::String const>&);,还有以下几种:1
2
3
4
5
6void callback(boost::shared_ptr<std_msgs::String const>);
void callback(std_msgs::StringConstPtr);
void callback(std_msgs::String::ConstPtr);
void callback(const std_msgs::String&);
void callback(std_msgs::String);
void callback(const ros::MessageEvent<std_msgs::String const>&);
MessageEvent类允许你在订阅的回调函数内获取信息的元数据。
其他常用的ros::Subscriber函数1
2
3
4
5
6// 注意: 只能判断话题是否发布,不能判断有没有发布消息
uint32_t getNumPublishers () const //获得连接订阅者的发布者个数
std::string getTopic () const //获得所订阅的话题
uint32_t getNumSubscribers () const //获得连接发布者的订阅者个数
订阅话题后,回调函数的参数类型必须是对应话题的消息类型,否则能订阅成功但不运行回调。
用于检测是否有订阅者1
2
3
4
5
6
7
8
9
10
11
12ros::Publisher pub = nh.advertise<std_msgs::Int8>("topic", 50, connectCb,disconnectCb);
// 回调函数如下
void connectCb(const ros::SingleSubscriberPublisher& pub)
{
ROS_INFO("topic Name: %s", pub.getTopic().c_str());
ROS_INFO("Subscriber Name: %s", pub.getSubscriberName().c_str());
}
void disconnectCb(const ros::SingleSubscriberPublisher& pub)
{
ROS_INFO("disconnectCb");
}
ROS的回调函数里定义count变量,居然报错ambiguous,看来以后最好不用count变量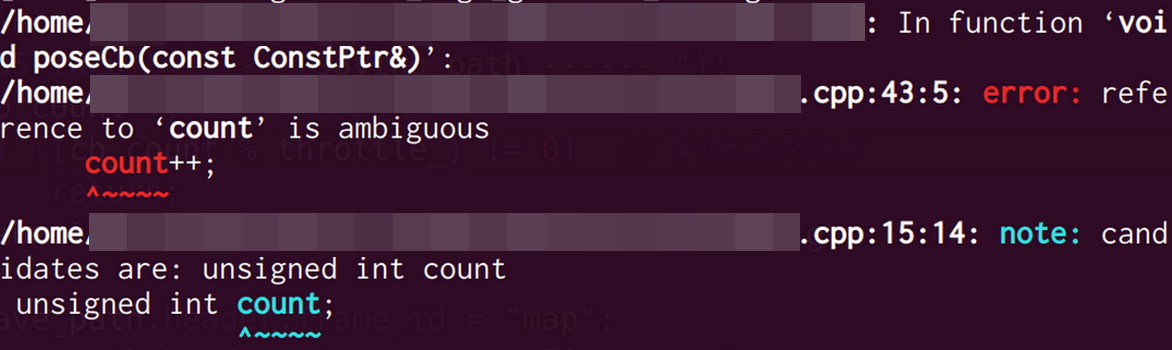
有时需要在订阅者的回调函数中发布消息,而且只发布一次,这时没必要用service混合topic,用static变量就可以做到:1
2
3
4
5
6
7
8
9
10
11
12
13
14
15
16
17
18
19
20
21
22
23
24
25
26
27
28static ros::Publisher *pubPtr;
static bool published = false;
void callback(const std_msgs::Int8ConstPtr& msg)
{
int num = msg->data;
ROS_INFO("msg: %d", num);
std_msgs::String str;
str.data = std::string(to_string(num) );
if(!published && num>8) // 在num>8时发布一次,以后再也不发布
{
pubPtr->publish(str);
published = true;
}
sleep(1);
}
int main(int argc, char** argv)
{
ros::init(argc,argv, "Sub");
ros::NodeHandle nh;
ros::Subscriber sub = nh.subscribe<std_msgs::Int8>("topic",20,callback);
ros::Publisher pub = nh.advertise<std_msgs::String>("new",50,false);
pubPtr = &pub;
ros::spin();
return 0;
}
ROS官方有这么一段话:1
2
3
4
5function subscribe() returns a Subscriber object that you must hold on to until you want to unsubscribe. When all copies of the Subscriber object go out of scope, this callback will automatically be unsubscribed from this topic.
function shutdown() Unsubscribe the callback associated with this Subscriber.
This method usually does not need to be explicitly called, as automatic shutdown happens when all copies of this Subscriber go out of scope
This method overrides the automatic reference counted unsubscribe, and immediately unsubscribes the callback associated with this Subscriber
根据说明,有以下三种方法:
一般让订阅者停止订阅的方法是等subscribe()生成的订阅者对象出作用域.
另一种方法就是explicitly调用shutdown(),典型方法是声明订阅者对象为全局变量,在回调函数中满足某条件时,对此对象调用shutdown(),但这样会直接退出程序,并不好
第三种方法其实与第二种类似,声明一个bool全局变量ok,订阅时执行
1 | while(!ok) |
在回调函数中满足某条件时,让ok=true
发布者的原型是这样的1
2
3
4Publisher ros::NodeHandle::advertise(const std::string & topic,
uint32_t queue_size,
bool latch = false
)
订阅者Subscriber ros::NodeHandle::subscribe函数里也有一个queue_size: Number of incoming messages to queue up for processing,消息队列是为了缓存节点接收到的信息,一旦自己处理的速度过慢,接收到的消息数量超过了queue_size,那么最先进入队列的(最老的)消息会被舍弃。
机器人应用中难免会遇到运算起来很费时间的操作,比如图像的特征提取、点云的匹配等等。有时候,我们需要在ROS的Subscriber的Callback回调函数中进行这些费时的操作。如果我们要是没有取舍的对于每个消息都调用一次回调函数,那么势必会导致计算越来越不实时,很有可能当下在处理的还是几秒以前的数据,之前的消息被舍弃了。所以,如果我们想只处理最新的消息,实际上只需要把两个queue_size都设置成1,那么系统不会缓存数据,自然处理的就是最新的消息。
rospy的订阅者还有个buff_size参数,要设置一个很大很大的数,这个缓冲区的大小是指消息队列使用的缓冲区物理内存空间大小。如果这个空间小于一个消息所需要的空间,比如消息是一副图片或者一帧点云,数据量超过了缓冲区的大小。这个时候为了保证通信不发生错误,就会触发网络通信的保护机制,TCP的Buffer会为你缓存消息。
但是roscpp里面没有buff_size参数,它获得 incoming message的大小,分配所需的缓冲区大小,然后一次读取整个incoming message
roscpp的定时器会计划在某一频率下执行一次回调操作,在订阅或服务中的回调函数队列机制中使用。
通过ros::NodeHandle::createTimer()创建: ros::Timer timer = nh.createTimer(ros::Duration(0.1), timerCallback); 其实有多个重载,这是用的比较多的一种。
回调函数只能是这种形式: void callback(const ros::TimerEvent&);
ros::TimerEvent结构体作为参数传入,它提供时间的相关信息,对于调试和配置非常有用。ros::TimerEvent结构体说明:
1 | // 上次回调期望发生的时间 |
常用代码1
2
3
4
5
6
7
8
9
10
11
12
13
14
15
16
17void callback(const ros::TimerEvent&)
{
ROS_INFO("Callback triggered");
}
int main(int argc, char** argv)
{
ros::init(argc, argv, "test_timer_node");
signal(SIGINT, SigintHandler);
ros::NodeHandle nh;
ros::Timer timer = nh.createTimer(ros::Duration(0.5), callback);
ros::spin();
return(0);
}
比如某些情况下,我们需要一直监视机器人的里程计数据状态,并在某个界面上显示出来。这种情况下可以用到定时器,
1 | void odomTimerCb(const ros::TimerEvent& e); |
未发布odom主题时,不会进入订阅者的回调函数odomSubCb,只进入定时器的回调odomTimerCb,此时消息成员odomData一直是false。
发布odom后,进入订阅者回调,此时odomData成为true,此时需要先停止计时器再打开。如果不停止,还会进入计时器回调,让消息成员赋值为false,实际造成赋值混乱。但是还得打开,因为一旦odom话题关闭了,就不会再进入订阅者回调,需要设法调用计时器回调,赋值false。订阅odom话题成功再打开计时器后,不会进入计时器回调。
1 | ros::init(argc,argv,"op_motor"); |
只发布一次消息就简单了,不必用while循环,直接发布就可以,但是最好也延时一次,防止订阅者的网络状况不好,当然如果不考虑有没有订阅者就不必延时了,不过这样没什么意义。
1 | ros::init(argc,argv,"node"); |
waitForMessage是等待一次消息,造成的网络传输会出现延时。如果是获得消息后再发布,新话题的发布频率会明显下降 为了保证发布频率,还是尽量使用spin()
这里用到的函数是ros::topic::waitForMessage,没有涉及回调函数,它有4个重载,常用的是两个:1
2
3template<class M> boost::shared_ptr< M const > waitForMessage (const std::string &topic, ros::Duration timeout)
template<class M> boost::shared_ptr< M const > waitForMessage (const std::string &topic, ros::NodeHandle &nh)
第一个是订阅话题topic,假如没有发布话题,那么等待时间timeout,超时后程序继续执行;第二个是如果没有发现话题topic,会一直阻塞,不能向下运行,除非执行rosnode kill。前一个用的比较多,注意时间不要设置太短,否则可能因为网络状况不好而订阅失败。
返回类型一看就知道是模板类的Boost共享指针,从这里就可以看出, 消息是以const Boost共享指针的形式传输,我们可以存储它而又不需要复制数据,waitForMessage就是返回了订阅到的消息,取指向就可以获得消息成员,也可以直接用指针获得消息成员。
注意模板类型有const,否则不符合重载声明
回调函数中常见的MsgType::ConstPtr参数类型其实就是boost::shared_ptr<const MsgType>
MsgType::Ptr就是boost::shared_ptr<MsgType>
参考:
新的电脑安装ubuntu16和18很容易出毛病,无线网卡不能用,驱动也装不成功。显卡驱动有问题,不能改变屏幕亮度和外接显示器等等问题。所以但是装新系统就不会有这些问题,因此ROS最好也用noetic,当然更新的是ROS2
Ubuntu 16.04 安装ROS kinetic报错Depends: ros-kinetic-desktop but it is not going to be installed
vim /etc/apt/sources.list,改为下面内容,也就是中科大的安装源:1 | deb http://mirrors.ustc.edu.cn/ubuntu/ xenial main restricted universe multiverse |
结果未变,再运行sudo apt-get -f install后安装了一个软件包,再安装ros-kinetic-desktop-full正常了
终端中输入vim /etc/hosts,加入185.199.110.133 raw.githubusercontent.com,或者从raw.Githubusercontent.com中选一个IP
退出后重新执行
从报错的内容找到安装包的地址,直接下载,有时一个软件包还有其他依赖包,都要下载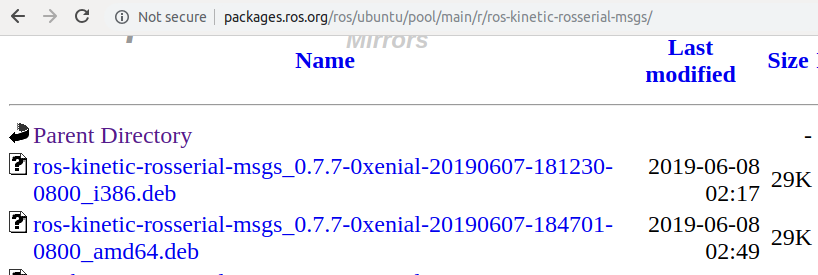
根据官方的文档,重新设置秘钥sudo apt-key adv --keyserver 'hkp://keyserver.ubuntu.com:80' --recv-key C1CF6E31E6BADE8868B172B4F42ED6FBAB17C654
编译时报错: No rule to make target '/usr/lib/x86_64-linux-gnu/libvtkproj4-6.2.so.6.2.0'
解决方法: sudo ln -s /usr/lib/x86_64-linux-gnu/libvtkCommonCore-6.2.so /usr/lib/x86_64-linux-gnu/libvtkproj4-6.2.so.6.2.0
在软件和更新的其他软件里添加两项:1
2deb http://packages.ros.org/ros/ubuntu xenial main
deb http://packages.ros.org/ros-shadow-fixed/ubuntu xenial main
然后执行sudo apt-get update,应该就能安装了。
在/etc/apt/sources.list里添加也是同样效果,但两个地方不能都添加,否则update时会报错
有时安装某个包出现下面情况,
在命令最后添加--allow-unauthenticated即可
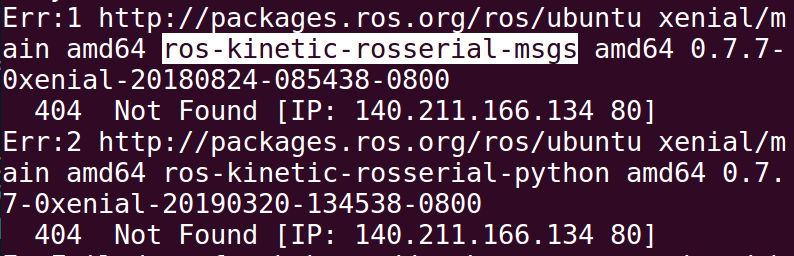
1 | Err:1 http://packages.ros.org/ros/ubuntu <YOUR_UBUNTU_VERSION>/main amd64 <SOME_ROS_PKG> amd64 0.13.3-0xenial-20190320-132757-0800 |
运行sudo apt update也无效,打开上面的网页后,发现安装包的版本是更新的,看来我们的安装没有更新。
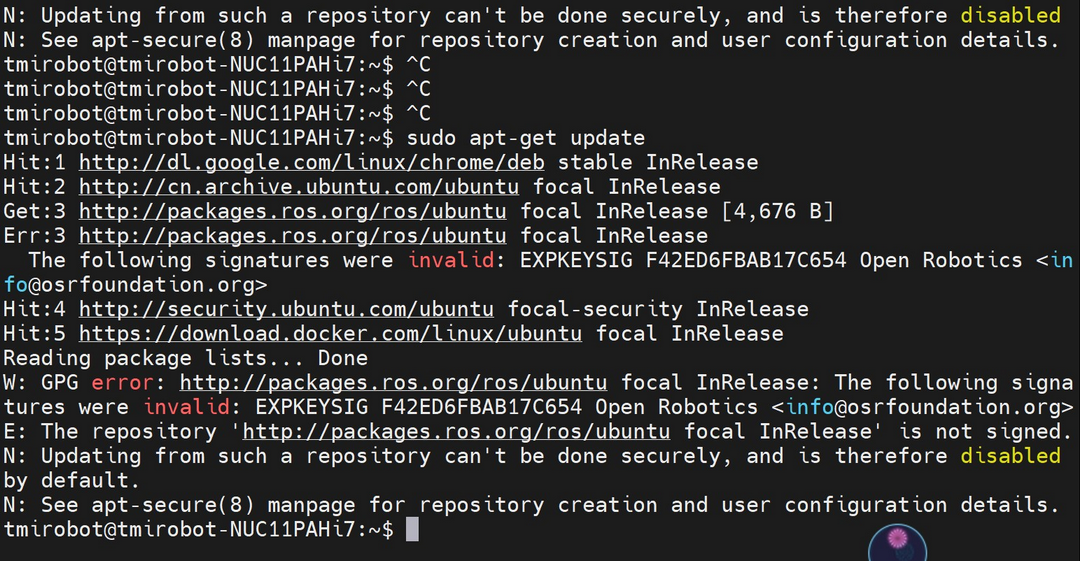
最后发现在2019年夏天,ROS官方更改了安装的Key,也就是第一次安装ROS时设置的Key。需要换成新的Key,步骤如下:
sudo apt-key del 421C365BD9FF1F717815A3895523BAEEB01FA116 (Kinetic及以后的版本)
sudo -E apt-key adv —keyserver ‘hkp://keyserver.ubuntu.com:80’ —recv-key C1CF6E31E6BADE8868B172B4F42ED6FBAB17C654
sudo apt clean
现在可以正常安装了,如果以后安装ROS,需要用这个新的Key,目前网上很多旧资料还是以前那个Key
参考:
apt update fails / cannot install pkgs
ROS报错“An error occurred during the signature verification”的解决办法
***.deb有时候我们解决了上面的问题,还是会出现下载ros包出现找不到的错误,这是因为ROS的包大部分都是在更新的,比如robot_state_publisher在2020年1月就更新了,如果没有apt-get update,是下载不到的
执行rqt_tf_tree出现报警:1
/opt/ros/melodic/lib/python2.7/dist-packages/rqt_tf_tree/dotcode_tf.py: 96: YAMLLoadWarning: calling yaml.load() without Loader=...is deprecated as the default Loader is unsafe. Please read https://msg.pyyaml.org/load for full details.
不理会也无影响,如果要解决,在dotcode_tf.py96行改为 yaml.load(input, Loader=yaml.FullLoader)
参考: yaml.load 问题
sudo pip3 install pyyaml 或者 sudo apt-get install python3-yaml
如果出现 Requirement already satisfied:,尝试下面命令1
2
3
4sudo apt-get install python3-catkin-pkg
sudo apt-get install python3-rospkg
sudo apt-get install python3-rospkg-modules
sudo apt-get install python3-catkin-pkg-modules
如果还有问题,那就是python版本问题,而不是安装的问题了,使用python3一般能解决,不过要explicitly指定,所以执行1
sudo apt install python-is-python3
在编译map_server时出错,是缺少了库文件:1
2sudo apt-get install libsdl-image1.2-dev
sudo apt-get install libsdl-dev
使用catkin_make时,如果缺某个包,会提示缺*Config.cmake文件,平时都会使用apt install直接安装这个包,这并不是只添加了*Config.cmake文件,而是有一系列文件,所以不能直接从其他电脑复制。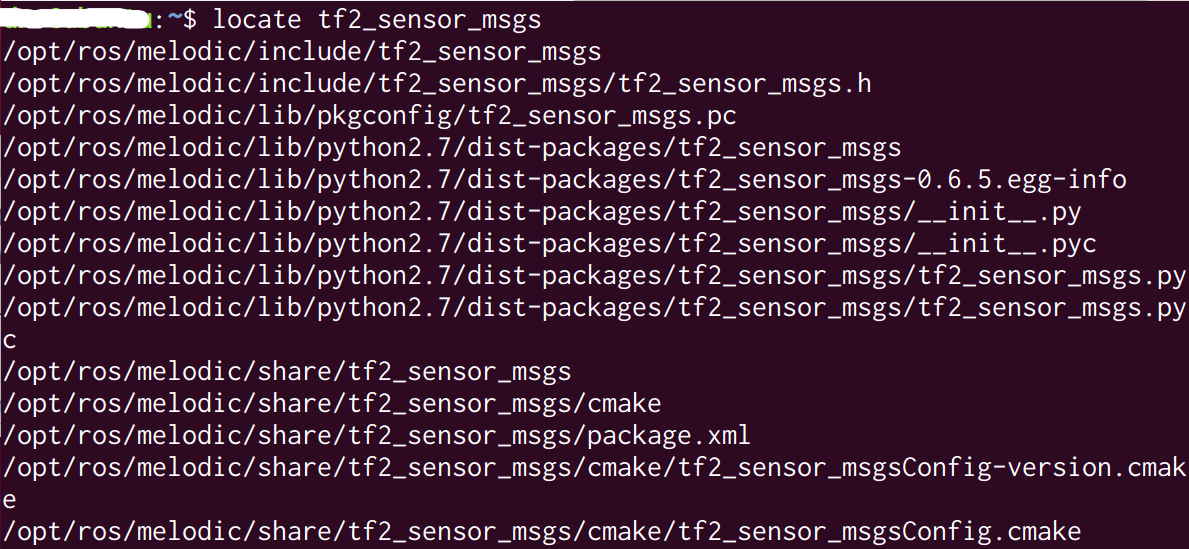
机器人的参数一般会提前设置好,这些参数都会放在yaml文件里,但有些参数是需要动态改变的,调试导航时尤其如此。于是ROS提供了rosparam命令和参数服务器这两个工具。rosparam命令的方便之处在于它可以直接读取yaml文件中的参数,而不必自己找第三方库去文件中读取。
一般在package的文件夹里会建一个param文件夹,也就是与launch和msg同一级,yaml文件就放在这个param文件夹里。
使用rosparam load file.yaml命令将多个参数加载到参数服务器,在用到时会从服务器中获取。但实际上,这个命令直接用得不多。要将一个yaml文件中的参数在节点启动时都加载到参数服务器,一般是在launch文件中使用rosparam标签:1
2<rosparam file="$(find turtlebot_navigation)/param/move_base_params.yaml" command="load" />
<rosparam file="$(arg custom_param_file)" command="load" />
加载完成后,可以使用一些调试性的命令了。用rosparam list查看所有参数。可以用rosparam get param查看某参数的值,用rosparam set param value设定参数的值。另外还可以用rosparam delete param删除某个参数。
在launch文件里,如果参数paramA是在某个node之内的,那么它的全名是/node/paramA。如果希望全名是paramA,那么不应在任何node内,一般写在launch开头。
使用rosparam get时要注意,参数名称不只是yaml文件中的名称,而是一个完整名称,比如.yaml中是这样的:1
2
3TrajectoryPlannerROS:
int_param: 2
max_vel_x: 0.15
要获得max_vel_x的值,命令是rosparam get /move_base/TrajectoryPlannerROS/max_vel_x,也就是/node/tag/param
启动ROS节点后, 用rosparam get param可获知各个参数值,而且发现在关掉所有节点后,仍然能用rosparam get获得参数值,可见它被存到参数服务器里了
加载参数的方法其实有三种,除了上面说的直接用rosparam load命令和launch文件中使用load外,还可以在程序中使用param和setParam,getParam函数,这里和yaml文件就没关系了。
1 | std::string s; |
getParam()函数可以从参数服务器获取参数值。如果成功,变量s和num的值将会被修改为参数值,函数返回true;如果不成功(譬如参数服务器没有设置这个参数),变量s和num将保持原值,函数会返回false。setParam()就是设置参数的值了。param()函数从参数服务器取参数值给变量。如果无法获取,则将默认值赋给变量,和param()函数的区别是还提供了一个默认值。
还有ros::NodeHandle::hasParam()和ros::NodeHandle::deleteParam()函数,后者可以在析构函数中使用。
如果在yaml文件中定义如下1
2
3waypoints:
X: [38, 38, 38, 38, 38, 38, 38 , 38.21, 39.25, 42.56, 48.97, 61]
Y: [-57, -45, -32.0, -18.5, -12.0, 0.0, 12, 35, 42.89, 80.41, 131.48, 139.47]
可以直接以vector形式获取数据1
2vector<double> X;
nh.getParam("/frenet_planner/waypoints/X", X);
使用yaml文件时,一定要注意格式的正确,但是最好不要用-符号,也就是不要用数组项,否则可能出问题,之前尝试使用一个第三方库读取yaml文件时,总是读取失败,发现只有加上-符号,也就是将参数作为数组项后才能正常读取。但再用rosparam get读取这个文件中的参数就会出错,结果获得的全是默认值,不是当前值。用rosparam list会发现加载的参数不全,原因是yaml文件中这样编辑:1
2
3
4TrajectoryPlannerROS:
-name: value
int_param: 2
max_vel_x: 0.15
不要加-name一行,也就是反而不能使用标准的yaml格式
YAML最基本,最常用的一些使用格式:
首先YAML中允许表示三种格式,分别是常量值,对象和数组1
2
3
4
5
6
7
8
9
10
11
12
13url: http://www.wolfcode.cn
server:
host: http://www.wolfcode.cn
server:
- 120.168.117.21
- 120.168.117.22
- 120.168.117.23
#常量
pi: 3.14 #定义一个数值3.14
hasChild: true #定义一个boolean值
name: 'Hello YAML' #定义一个字符串
ROS默认的yaml-cpp版本一般在0.5以上,CMakeLists如下配置1
2
3
4
5
6
7
8
9
10include_directories(
/usr/include
${catkin_INCLUDE_DIRS}
)
add_executable(${PROJECT_NAME} src/test_yaml.cpp)
target_link_libraries(${PROJECT_NAME}
${catkin_LIBRARIES}
yaml-cpp # 这里必须有
)
从map_server中学习一段代码:1
2
3
4
5
6
7
8
9
10
11
12
13
14
15
16
17
18
19
20
21
22
23
24
25
26
27
28
29
30
31
32
33
34
35
36
37
38
39
40
41
// 必须自定义,不明白为什么网上的资料都没有提到
template<typename T> void operator >> (const YAML::Node& node, T& i )
{
i = node.as<T>();
}
int main(int argc, char** argv)
{
ros::init(argc, argv, "test_yaml" );
ros::NodeHandle nh;
std::string file = "/home/user/map.yaml";
std::ifstream fin(file.c_str());
if (fin.fail() )
{
ROS_ERROR("could not open %s.", file.c_str());
return false;
}
// 适用于 0.5 以上版本
YAML::Node doc = YAML::Load(fin);
try {
double res, negate;
std::string image;
doc["resolution"] >> res;
doc["image"] >> image;
ROS_INFO("res: %f", res );
ROS_INFO("negate: %f", negate);
ROS_INFO("image: %s", image.c_str() );
}
catch (YAML::InvalidScalar &e) {
ROS_ERROR("The map yaml file error, reason: %s.", e.what());
return false;
}
}
读YAML的最好方法是使用Python的yaml库PyYAML,到官网下载安装后,可以先运行测试程序看是否成功。
读取程序如下:1
2
3
4
5
6import yaml,os
f = open("test.yaml")
y = yaml.load(f,Loader=yaml.FullLoader)
print y
运行后,结果:
创建package后,package.xml不需要再修改
创建package命令是catkin_create_pkg nodeName
package的名称对应CMakeLists中的project(package)和package.xml中的<name>package</name>
package的命名是有官方规范的,我意外地发现test这个名字往往会带来问题,可能是因为带test的package都是用于测试的,所以要避免使用。基本规则如下:
不要轻易用msg, launch, test这样的字符串做名称,容易出问题。如果命名不规范,编译时会告警,影响编译时间。查看官方package列表,发现除了tf这样一个单词做名称的例子外,其他基本都是a_b或a_b_c这样的名称,例如tuw_geometry_rviz,所以这样命名比较稳妥。
每个package.xml文件必须包含的标签包括:
<package> : 最高级tag,属性:format,用于指定格式 <name> :package名称<version> :当前版本<description>:package的基本描述<maintainer>(至少一个):维护者<license>(至少一个):协议<buildtool_depend>(至少一个): 一般情况下只需要指定catkin作为编译工具, 在需要交叉编译的情况下需要增加目标机器的编译工具可选标签包括:
<build_depend> (多个):编译时需要依赖的其它package,适用于静态库<exec_depend> (多个):运行时需要依赖的其它package,适用于静态库build_export_depend: 编译时需要链接(build against)的package<export>:用于添加额外的信息,比如需要嵌入的其它package的插件,或者一些说明信息。
使用depend可以表示同时包括build和exec依赖,也就是说<depend>roscpp</depend>相当于1
2<build_depend>roscpp</build_depend>
<exec_depend>roscpp</exec_depend>
一般都包括的几个是1
2
3
4
5
6<buildtool_depend>catkin</buildtool_depend>
<build_depend>message_generation</build_depend>
<exec_depend>message_runtime</exec_depend>
<!-- 可能还有其他msgs类型 -->
<depend>std_msgs</depend>
<build_export_depend>std_msgs</build_export_depend>
4个ROS的重要路径,可在CMakeLists中用message函数查看:
CATKIN_PACKAGE_LIB_DESTINATION: lib库的路径
CATKIN_PACKAGE_BIN_DESTINATION: 可执行文件的路径
CATKIN_PACKAGE_SHARE_DESTINATION:共享文件的路径,就是CMakeLists中的INSTALL生成的两个cmake文件的路径
catkin_INCLUDE_DIRS: 跟catkin有关文件的路径,不仅仅是ROS相关的

在代码中包含另一个package的头文件时,经常写成#include<robot_api/robot_api.h>,注意程序目录结构必须是这样: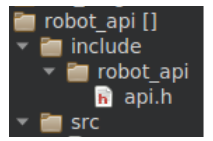
| 尽量只用一个工作空间,如果用到两个以上,不要出现同名package,也不要出现不同工作空间的包有依赖的情况 |
如果在/opt/ros/kinetic/之外,如果我们创建了多个工作空间且需要在多个工作空间中来回地工作,比如/home/user/catkin_ws1 和 /home/user/catkin_ws2
ROS_PACKAGE_PATH环境变量中的多个目录是有先后顺序的。如果工作空间1和2中的所有包之间没有依赖关系,那么将下面两句话放在bashrc文件中合适的位置(至少应该放在source /opt/ros/kinetic/setup.*sh后)。1
2source /home/user/catkin_ws1/devel/setup.*sh --extended
source /home/user/catkin_ws2/devel/setup.*sh --extended
后面source的工作空间会遮蔽之前工作空间的同名包,比如opt/ros/indigo/share/中安装了move_base包,又在/home/user/catkin_ws1中通过下载源代码的方式安装了move_base,由于ROS_PACKAGE_PATH环境变量的遮蔽效果,我实际用的是/home/user/catkin_ws1/中的move_base,这正是我们常常的目的
环境变量中这样设置:1
2source /opt/ros/kinetic/setup.zsh
source /home/xiaoqiang/catkin_ws/devel/setup.zshROS_PACKAGE_PATH结果是/home/xiaoqiang/catkin_ws/src:/opt/ros/kinetic/share,也就是说后source的工作空间会排在ROS_PACKAGE_PATH的靠前部分,也就是优先级高
先source devel/setup.bash,再source /opt/ros/melodic/setup.bash,没有source install/setup.bash1
2
3
4
5
6
7
8
9
10
11
12
13
14
15
16
17
18
19# libmove_base.so 所链接的 libcostmap_2d.so 是deve/lib里的
user@user:~/catkin_ws/install/lib$ ldd libmove_base.so | grep user
libcostmap_2d.so => /home/user/my_ws/devel/lib/libcostmap_2d.so (0x00007f1d87062000)
user@user:~/catkin_ws/install/lib$ locate libcostmap_2d
# 有5个 libcostmap_2d.so
/home/user/catkin_ws/devel/lib/libcostmap_2d.so
/home/user/catkin_ws/install/lib/libcostmap_2d.so
/home/user/my_ws/devel/lib/libcostmap_2d.so
/home/user/my_ws/install/lib/libcostmap_2d.so
/opt/ros/melodic/lib/libcostmap_2d.so
# 删除 devel/lib/libcostmap_2d.so
user@user:~/catkin_ws/install/lib$ rm /home/user/my_ws/devel/lib/libcostmap_2d.so
# 此时就会链接到 ros 自带的 libcostmap_2d.so
# 如果ros自带的也被删除,就会链接失败,不去链接其他的 libcostmap_2d.so
user@user:~/catkin_ws/install/lib$ ldd libmove_base.so | grep cost
libcostmap_2d.so => /opt/ros/melodic/lib/libcostmap_2d.so (0x00007f15a177a000)
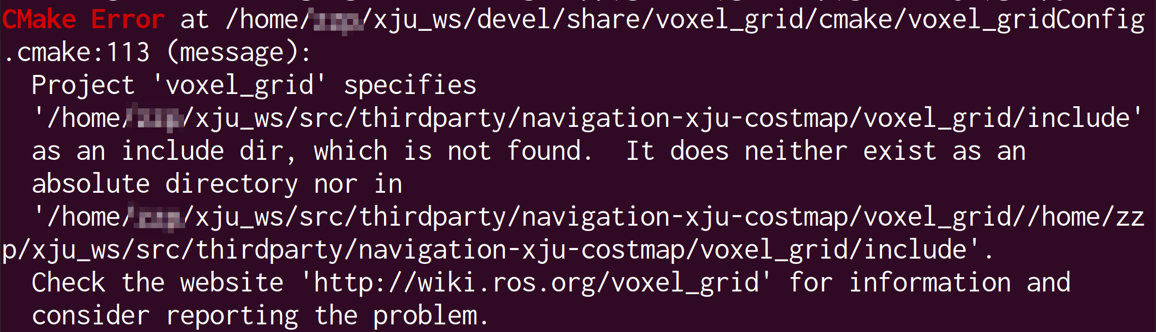
很奇怪,我编译的工作空间已经有voxel_grid,结果会去另一个工作空间找同名的包,但那个包已经被我删了,所以找不到,结果报错。
看catkin_make开头的信息,发现这里就涉及到了xju_ws这个包了

发现build文件夹里的几个文件涉及了xju_ws,但是如果删除再编译,还是会生成一模一样的文件。
最后只有重建一个工作空间,执行catkin_init_workspace,再编译,问题解决。